Automatic ETS device detection
Table of contents
The ETS auto detection algorithm is one of the functionalities our users are most excited about.
It saves hours of work of manually configuring devices and typing in hundreds of group addresses by hand.
With a good ETS project configuration it usually detect between 80% - 100% of all KNX devices that can be bridged to smart assistant apps.
🎬 Video tutorial
Let Gregor show you everything about ETS device auto detection in a quick 5 min video section.
Best way to setup your ETS project file
For optimal results with ETS auto detection make sure that your ETS project file follows our ETS configuration guidelines.
Upload ETS project file
To upload your ETS project file, go under Devices tab, click Add device and select Upload ETS file. You will be presented with a screen as shown below.

You can select the Gateway to which detected devices will be connected.
If your ETS file is password protected also provide it in the password field. ETS password is never stored on the system or in our cloud and is only used to parse the ETS project file to extract it's data.
INFO
Note that for the ETS auto detection to work the internet connection is necessary due to fairly demanding requirements to run the algorithm. This is one of the exceptions where connection to 1Home cloud is needed.
Overview of detected devices
I am not very familiar with ETS. Can I skip the devices overview and just submit all detected devices?
Yes, you actually can.
All of the devices that don't have any issues will be imported. After this is done, only the not imported devices will be left in the overview screen and you will be able to check if out of those you still want to fix and import any of them.
Note though that this view gives you the simplest way to check what was detected, even if ETS knowledge is not one of your biggest strengths.
What if I only want to import group addresses to have them available in the group address selector?
In such case, simply upload your ETS project file and once the screen with the overview of the detected devices in shown, close the whole ETS detection window.
Group addresses have been already stored in the background and will be available under any group address selector (e.g. when manually creating a device).
Nevertheless, we do suggest you to use the ETS auto detection to help you import your devices faster.
After the detection is successful you will be presented with the overview of all detected devices.
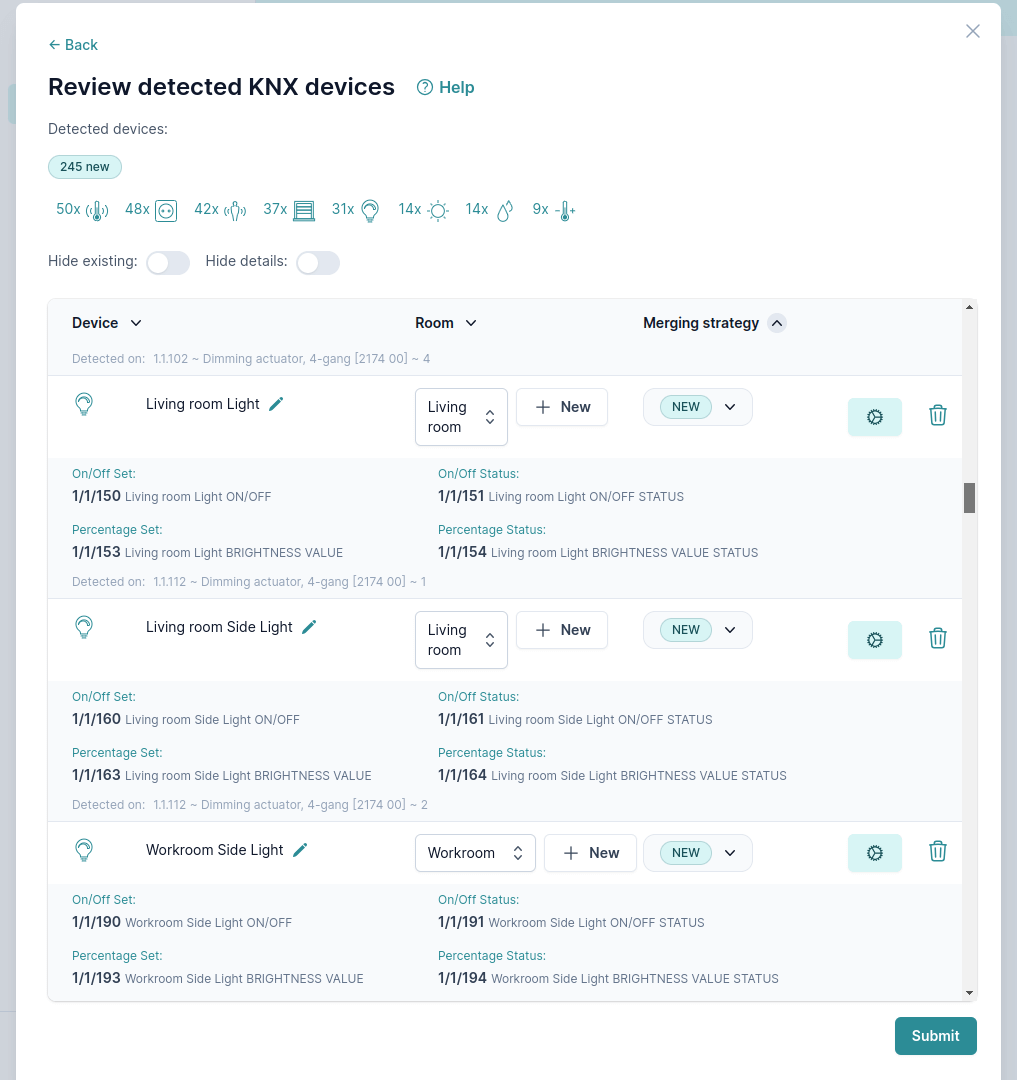
This is an enormous KNX installation in the image above! Imagine typing in group addresses to configure around 150 devices that were selected to be controlled with Apple Home via Matter. Thankfully, the owner of this smart home was able to avoid it using our ETS auto detection. 😄
Bulk delete not needed devices
You can easily delete devices that you don't want to import with a bulk delete feature available in the top right corner.
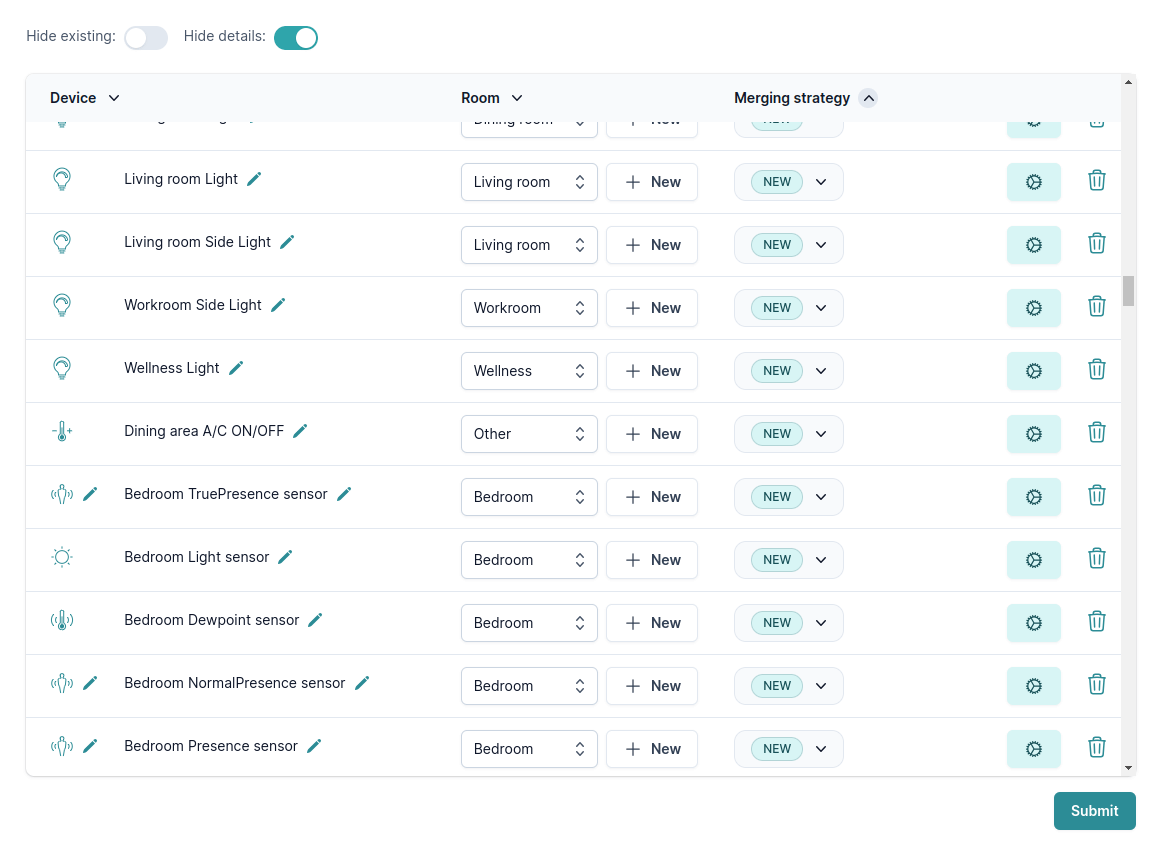
Hide details for better overview
For a better initial overview you can enable Hide details button. This way you can first remove unnecessary devices before checking the ones you actually want to use.
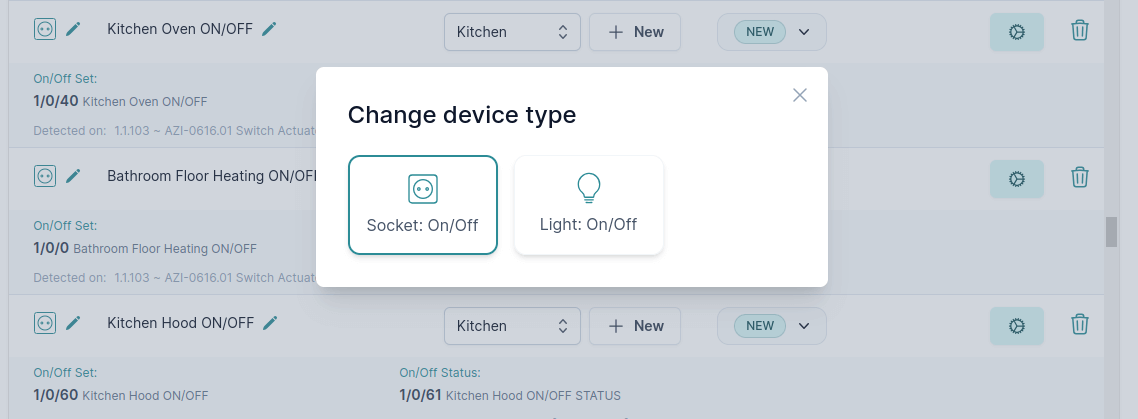
Change device types
Understanding the difference between a socket and a light during ETS detection is sometimes quite difficult. Thus you can change the type of certain device types by clicking the 🖊️ next to the device icon.
Shorten names
Matter standard requires all device names to be of maximum 29 letters long. We have added a couple of shortcuts to help you trim your names in such case.

Fix any configuration issues
For each device you can view what group addresses were selected for every device attribute (set on/off, status on/off, etc.).
If you find any mistakes, you can easily fix them using the Configure button that shows you the configuration view of the device.

Adjust detected rooms
Rooms are auto-detected as best as possible based on the provided details in ETS and some additional language processing magic 🪄.
This however, is for some ETS projects the hardest part and certain rooms might not be recognized.
In the detected devices view you can easily create new rooms or move devices between them.
Submit your changes
Once you are ready you can submit your detected devices - and voila - they appear under your devices list!
Suggestion
After submitting your devices make sure to go through our Check configuration guide to catch and fix any hidden mistakes that might have went unnoticed.
Re-upload changed ETS project file (merging)
Often times you upload ETS project file but later you need to change it or add new devices.
You can safely re-upload your updated ETS project file.
Our algorithm will detect which devices were changed, which stayed the same and which are new.
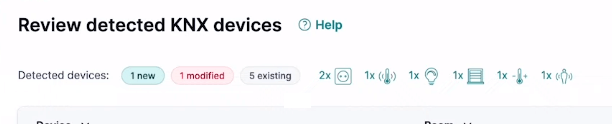
You can see in the example above that 1 new, 1 modified and 5 existing devices were detected.
View the merging status of each device in one of the columns as shown below. Also note the Hide existing toggle button to make the work easier when many devices are detected as existing.
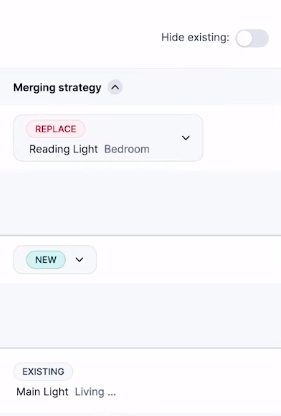
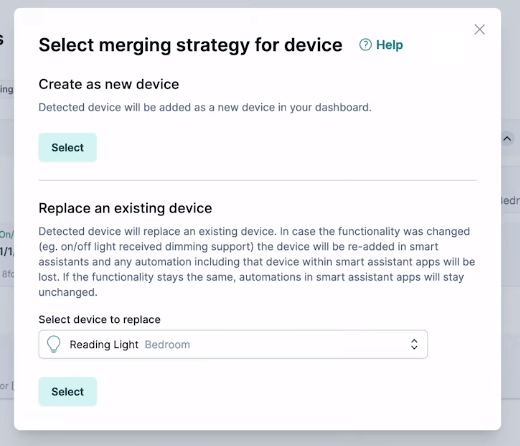
If you click on the Merging strategy button for a specific device, you can change it.
After you review your changes you can click Submit and changes are applied. All without breaking what was previously detected.