Program KNX with built-in IP interface
Table of contents
Important
To program other KNX devices via ETS using 1Home Server as an IP interface, you first need to define individual addresses that the 1Home Server will use for communication on the bus. A default value for individual addresses can cause issues when programming certain KNX devices and it is important to first reserve them in ETS.
Configure IP interface
To correctly configure 1Home Server as a KNX IP interface, you will first have to reserve the individual addresses in your ETS project file.
1. Reserve individual addresses in ETS project file
We will reserve 1 IA (individual address) for our 1Home Server physical device, and 5 IAs for the possible tunnel connections via 1Home KNX gateways. Note that 4 tunnels can be used to connect to other KNX IP interfaces (as explained in this article), while one is reserved.
We will do this using dummy devices provided in the ETS catalogue search.
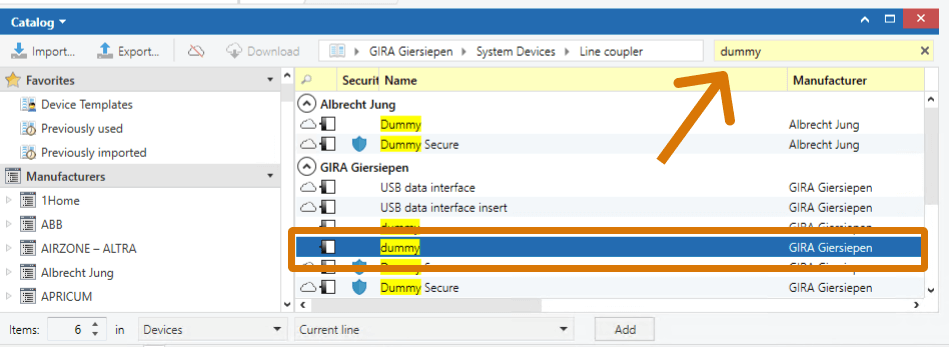
1.1. Add dummy devices
Within your ETS project, in the ETS catalogue, search for keyword dummy across all catalogues. Then add 6 dummy devices (e.g. the ones from GIRA catalogues).
1.2. Note the assigned individual addresses
After you add 6 dummy devices, you will see them in the list of added devices as shown in the image below.
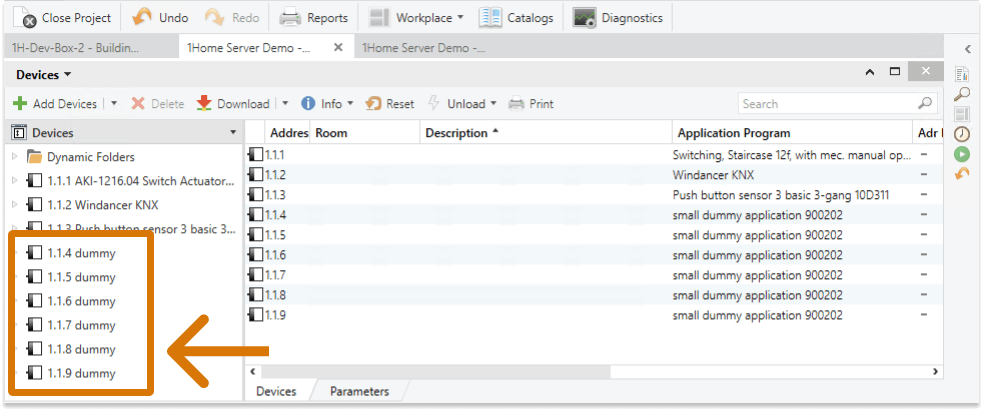
As you can see, individual addresses are automatically assigned to each of them (in the image above 1.1.4 up to 1.1.9). Write down those to later input them into 1Home Server dashboard.
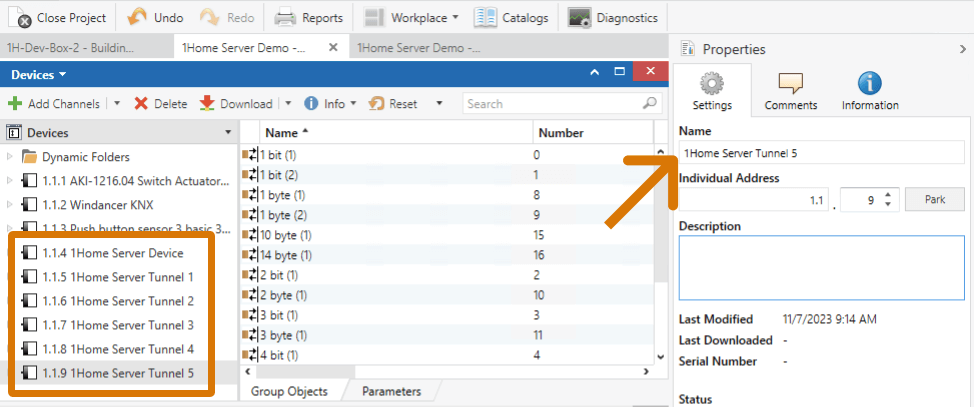
1.3. Update the names of dummy devices
To keep the ETS tidy and organized, simply rename the dummy devices as shown in the image below.
Name the first reserved individual address the 1Home Server Device, while others are used for the tunnels.
2. Update individual addresses in 1Home Server
Now that we have reserved the individual addresses in ETS, let's update them in 1Home Server Dashboard.
Go under Integrations -> KNX and click Configure under IP Interface settings.
Then copy the individual address assigned for 1Home Server Device to Device individual address (1.1.4 in the image above), while in Tunnel individual addresses only input the first IA (1.1.5 in the example above). Under the Tunnel individual addresses make sure that all values in the range are also reserved in the ETS (1.1.4 up to 1.1.9 in this example, but yours might differ).
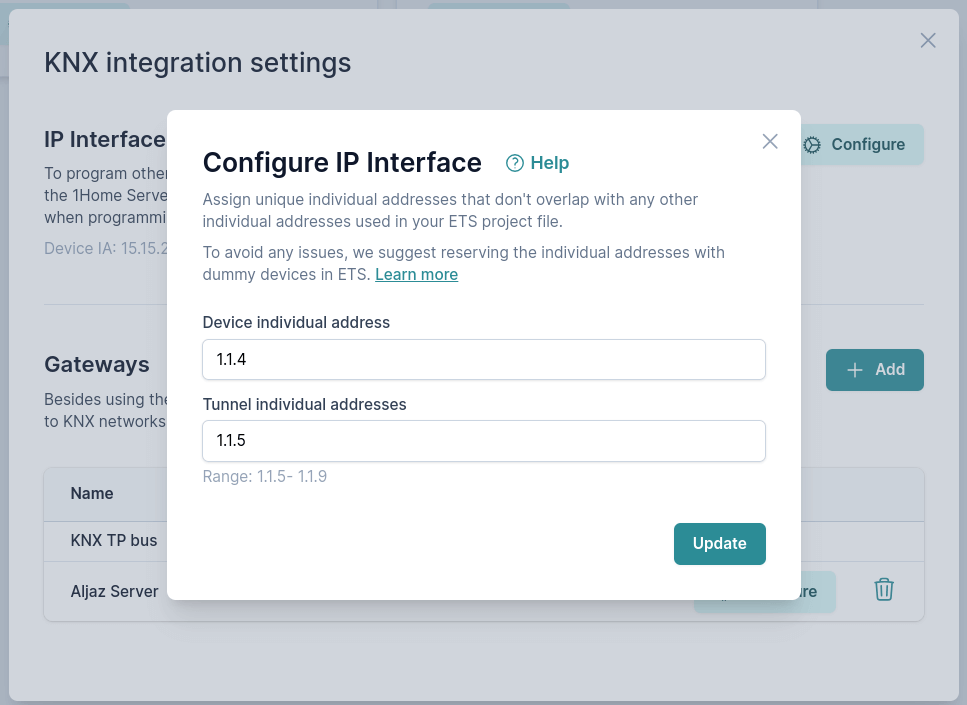
Then press update.
Now you will be able to program KNX devices via 1Home Server's IP interface using the defined individual addresses.
Connect with ETS software
1Home Server's IP interface should now be automatically discovered in your ETS software. You can select it to use it with your project. 👏
Are you using a Line coupler?
Make sure that the line coupler allows forwarding traffic to the above devices with configured individual addresses.
Program KNX remotely
To learn how to program KNX remotely, please first follow the instructions above. Then check the how to program KNX remotely guide.