Set up the Sonos integration
Follow these steps in order to bring your Sonos speakers into 1Home for the first time. The workflow has two halves: first you link your Sonos account at the integration level, then you add individual speakers as 1Home devices.
Table of contents
1. Enable the Sonos integration
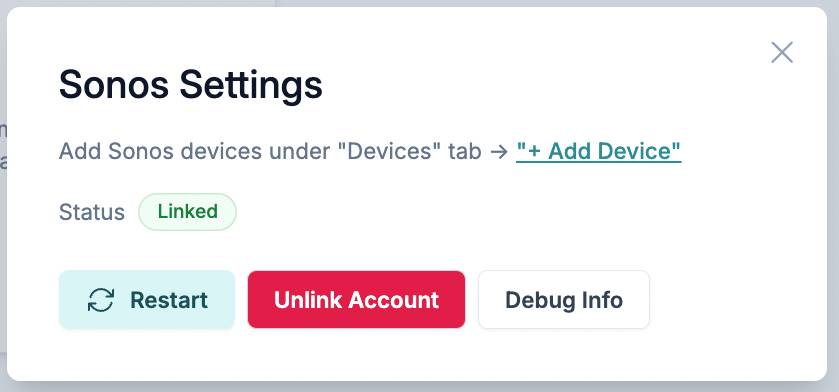
Navigate to Integrations. Click Configure on the Sonos tile to open the Sonos Settings screen.
Click Link Sonos Account to start the authorization flow.

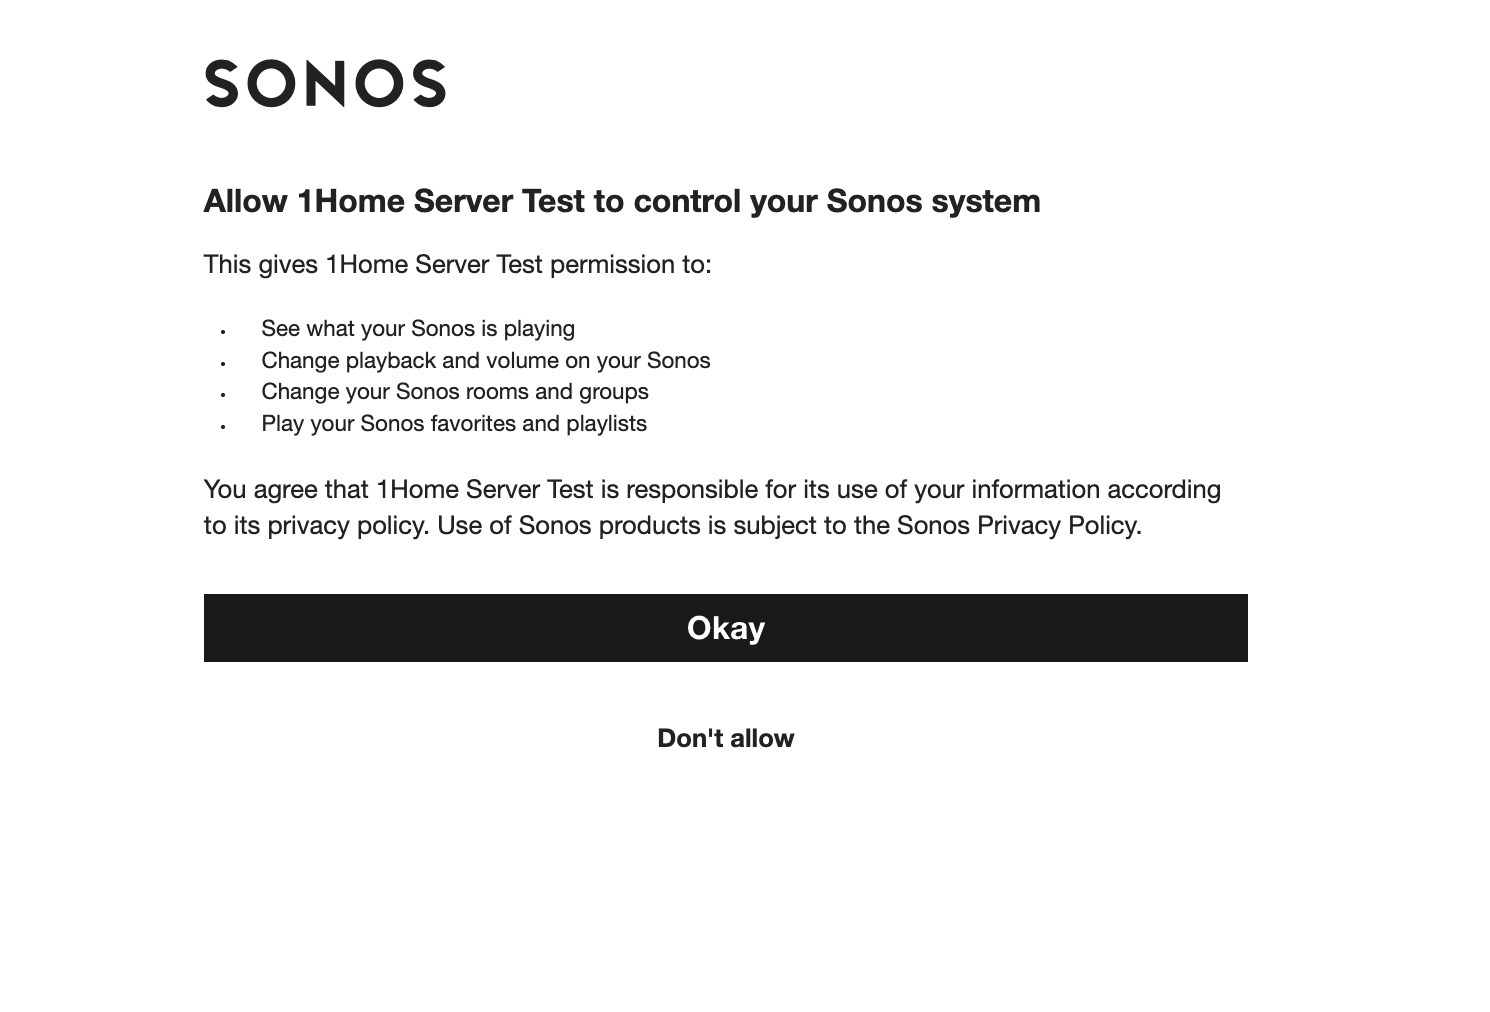
2. Authorize with your Sonos account
A Sonos authorization page opens in a new browser window. Sign in with the Sonos account that owns the speakers you want to control from 1Home, then confirm the authorization request.
When you return to the 1Home dashboard, the status badge on the Sonos Settings screen now reads Linked, and the Restart and Unlink Account buttons become available.
3. Add your first Sonos player
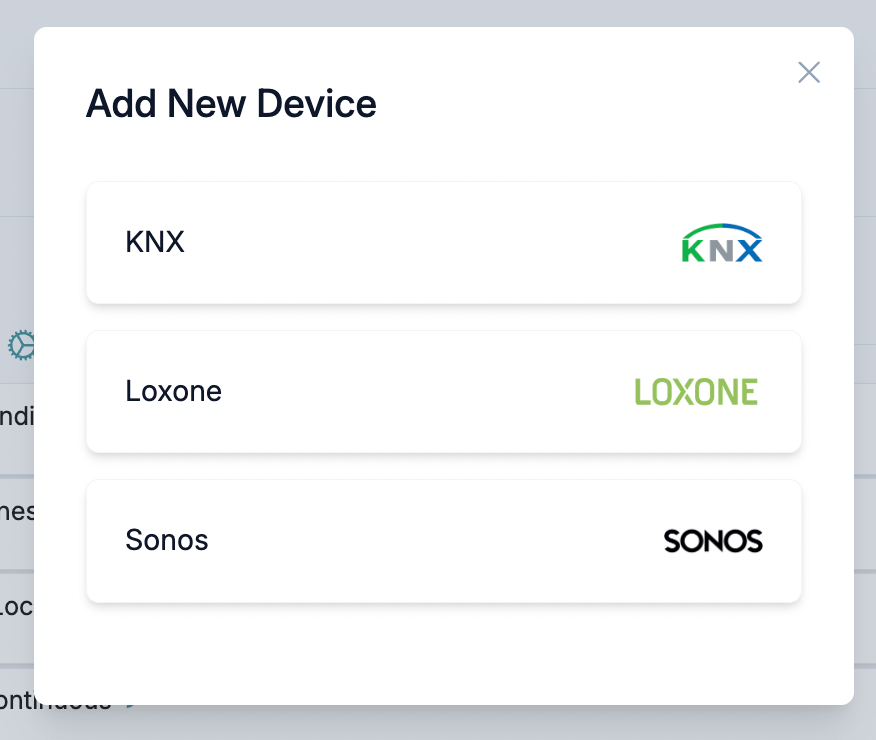
Navigate to Devices and click + Add Device. Select Sonos from the list of integrations.
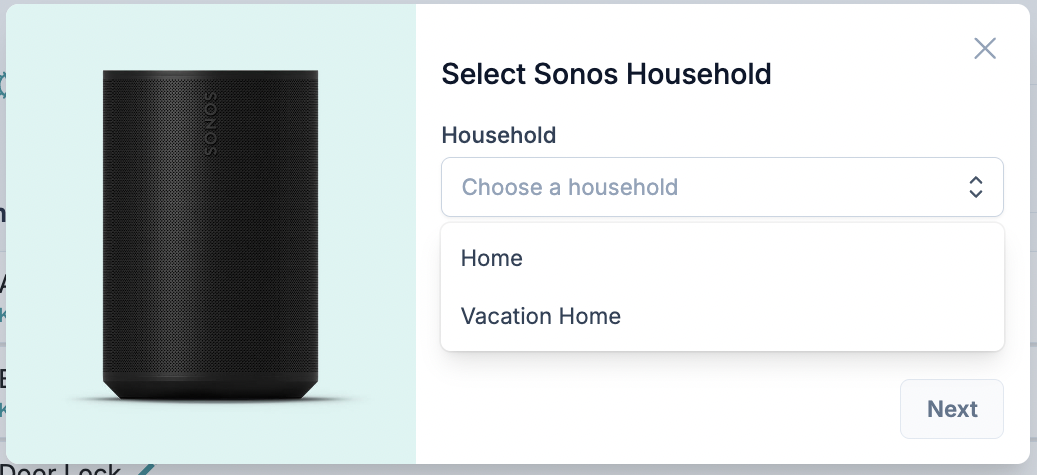
4. Select a Sonos household
This step is only for users with multiple Sonos households. A household is the set of speakers registered to one Sonos account. If your Sonos account owns more than one household — for example, a home and a holiday home — you will need to pick which one you are setting up in 1Home.
Pick the household from the Household dropdown and click Next.
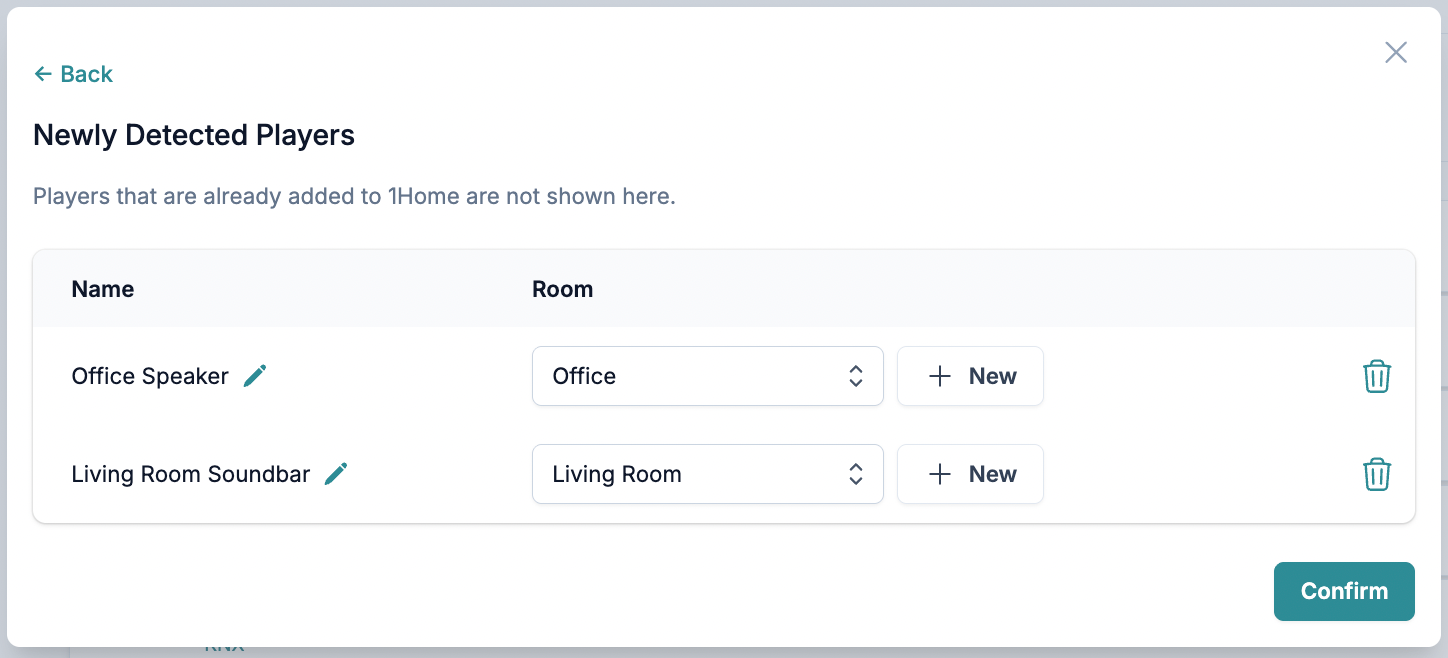
5. Choose which players to add
The Newly Detected Players table lists every Sonos speaker in the chosen household that is not yet imported to 1Home. Speakers that are already imported don't appear here — that is intentional, to keep the list focused.
For each player you want to add:
- Give it a Name. This is the name that will appear on the 1Home dashboard, on the mobile app, and in automations. You can edit the default name inline.
- Pick a Room from the dropdown. Only rooms that are already configured on your 1Home Server appear here.
When you have named every player and assigned each one to a room, click Confirm. The players appear immediately as devices in the 1Home dashboard.
6. Next steps
- Controls — use your new Sonos players from the 1Home dashboard.
- Automations with Sonos — trigger on playback state, or act on Sonos from any other event in your home.
- Control Sonos from KNX — wire Sonos commands and status onto KNX group addresses.
Re-linking or switching accounts
To change to a different Sonos account, open the Sonos Settings screen and click Unlink Account. Then start over from step 1 with the new account.